Your own game
Turn your pitch card into a real game. Get the core loop working, add a way to win and lose, then polish it with one idea from the course.
Every game studio works this way: a one-page pitch, a rough prototype, then playtest, fix, and add one thing at a time until it is fun.
In Will it work in Arcade? you wrote a pitch card (the genre, the building blocks, the hard part and a workaround) and built a one-screen prototype. Now you make it a real game, in three milestones. This time there is no code to start from: only goals. Keep your pitch card beside you.
Big games are built in small, playable steps. After each milestone, play your game and ask someone else to play it too.
- Predict: Read the code and say what it will do before you run anything. A wrong guess is fine: it shows you what to look for.
- Run: Run it and compare the result with your prediction.
- Make: Build something new using what you have learned. Expect a few tries; that is normal.
Make your prediction first. Help opens once you've locked it in.
Predict
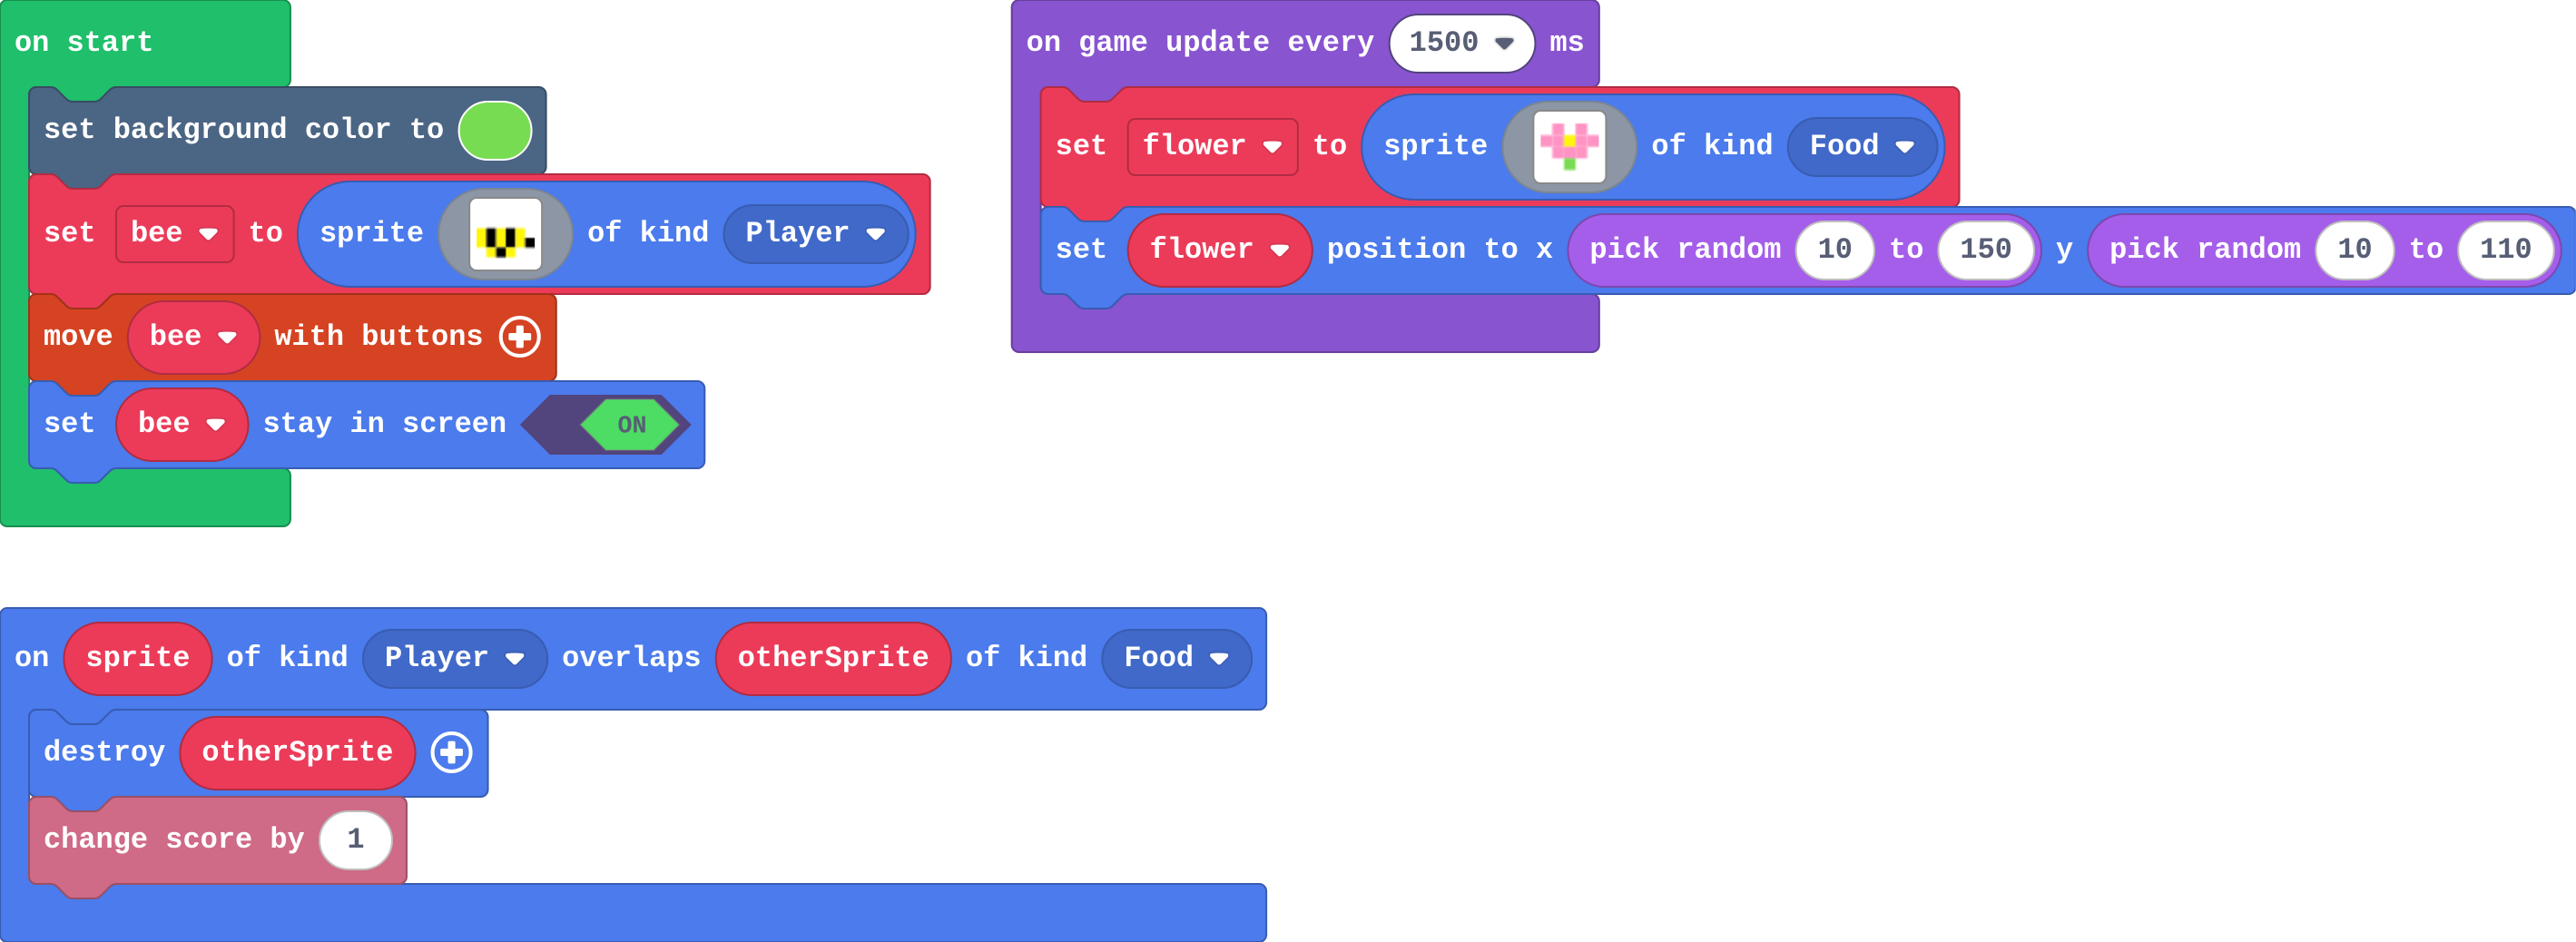
Show as code
let flower: Sprite = null
sprites.onOverlap(SpriteKind.Player, SpriteKind.Food, function (sprite, otherSprite) {
    otherSprite.destroy()
    info.changeScoreBy(1)
})
scene.setBackgroundColor(7)
let bee = sprites.create(img`
    . . 1 1 . .
    . . 1 1 . .
    5 f 5 f 5 .
    5 f 5 f 5 f
    . 5 f 5 . .
    `, SpriteKind.Player)
controller.moveSprite(bee)
bee.setStayInScreen(true)
game.onUpdateInterval(1500, function () {
    flower = sprites.create(img`
        . 3 . 3 .
        3 3 5 3 3
        . 3 3 3 .
        . . 7 . .
        `, SpriteKind.Food)
    flower.setPosition(randint(10, 150), randint(10, 110))
})
Kai's pitch card: a bee collects flowers before winter comes; the hard part is a wasp that chases the bee.
Run
Play Kai's prototype. A prototype is meant to be rough: it only tests whether the core idea is fun.
Show as code
let flower: Sprite = null
sprites.onOverlap(SpriteKind.Player, SpriteKind.Food, function (sprite, otherSprite) {
    otherSprite.destroy()
    info.changeScoreBy(1)
})
scene.setBackgroundColor(7)
let bee = sprites.create(img`
    . . 1 1 . .
    . . 1 1 . .
    5 f 5 f 5 .
    5 f 5 f 5 f
    . 5 f 5 . .
    `, SpriteKind.Player)
controller.moveSprite(bee)
bee.setStayInScreen(true)
game.onUpdateInterval(1500, function () {
    flower = sprites.create(img`
        . 3 . 3 .
        3 3 5 3 3
        . 3 3 3 .
        . . 7 . .
        `, SpriteKind.Food)
    flower.setPosition(randint(10, 150), randint(10, 110))
})
Build your game
Build your prototype again here (you planned it, so it is quick), or copy it across: in your Will it work in Arcade? playground switch to JavaScript, copy everything, then paste it into JavaScript here.
The smallest version of your game that someone could play:
- a player the controller moves (or makes jump),
- something to collect or reach,
- a danger to avoid,
- a score.
Play it for one minute. Is the core idea fun? If not, change it now, before you add more.
Need a hint?
Look at the building blocks on your pitch card. Which kind is the player, which is the goal (Food?) and which is the danger (Enemy?).
Another hint
Each touch that matters needs an overlap event naming two kinds. Score and lives are in Info.
Give your game an ending. Choose what fits your pitch card:
- lives that run out (the game ends at zero by itself),
- a countdown (the game ends when time is up),
- a target: reach a score, or a place, and call game over with a win.
Test both endings: win once and lose once.
Need a hint?
Choose how the game ends: lives that run out, a countdown, or a target score that calls game over (win).
Another hint
game over has a true or false: true is a win, false is a loss.
Choose one idea from the course:
- levels that get harder (a level variable and a list),
- a power-up (a true/false variable and a timer),
- a chaser that follows the player,
- gravity and jumping.
Then ask someone to play your game. Watch without helping, and write down where they got stuck.
Need a hint?
Pick the one polish that fits your pitch card best, and only one. Look back at the lesson that taught it.
Another hint
Play it after each change. If the game is less fun, undo the change.
The core loop works: a player you control, something to collect or reach, a danger, and a score.
This ticks by itself when your blocks do what is asked.
Arcade's real tools
You have built a whole game from the course's building blocks. Real Arcade games use a few more tools that are worth exploring next, with your teacher:
- Tilemaps (in Scene): draw a level from tiles, with walls the player cannot pass and floors to stand on. The camera can follow the player through a world much bigger than the screen. Platformers, mazes and adventures use them.
- Animation: a sprite can flip through several pictures, so a character walks or a coin spins.
- Extensions (in the toolbox, the Extensions button): extra blocks other people have written, for example for menus, dialogue or saving a game.
Which one would make your game better, and how?
For teachers
An optional, open project. Students turn the pitch card and prototype from Will it work in Arcade? into a game of their own, in three milestones with goals only, then look ahead to tilemaps, animation and extensions. About 120 minutes.
Open the teacher guide: answers, solutions, slides and a worksheet.
Students will be able to
- I can plan a game and choose the building blocks it needs.
- I can build a game in playable milestones, testing after each one.
- I can improve my game from what I see when someone else plays it.
Before class
This lesson is optional and open: it is the high ceiling of the course. Students start from the pitch card and one-screen prototype they made in Will it work in Arcade? (genre, building blocks, the hard part and a workaround). There is no starter code and no new block; every milestone is a goal, not a recipe. Only Milestone 1 has a code check (sprites, an overlap event and something from Info, such as score or lives); the others are honest ticks after testing, because every game ends and polishes differently.
Scope is the main risk. Students aim for a big game and finish nothing. Hold the line: Milestone 1 must be playable before anything else is added, and Milestone 3 is one polish, not three. A small finished game beats a big unfinished one. If a pitch card is "not a good fit" for Arcade (3D, realistic physics, typing-heavy), steer back to its workaround from Will it work in Arcade?.
Playtesting is the habit to build: after each milestone someone else plays for one minute while the maker watches in silence and notes where they got stuck. Then the maker changes one thing. Budget two to four lessons for a full project; one lesson gets most students through Milestone 2.
Students' work is saved in this browser only. Copying from the Will it work in Arcade? playground (switch to JavaScript, select all, copy, paste) keeps the prototype; the editor's Download saves a file as a backup.
Running the lesson
- Predict and Run: Kai's prototype has a goal but no danger and no ending. Use it to name the three milestones before anyone builds.
- Before Milestone 1: each student reads their pitch card to a partner in 30 seconds. The partner asks: what is the player, the goal, the danger?
- Milestone 1: check that it is playable after 20 to 30 minutes. If a student is still drawing sprites, set a 5-minute art limit: rough art first, nice art last.
- Milestone 2: ask students to test both endings. Lives and countdowns end the game by themselves; a target score needs game over (true).
- Milestone 3: one polish only. Point students back to the lesson that taught it (Levels, Power-ups, Else and chasing, Gravity and jumping).
- Playtest: pairs swap seats. The player plays; the maker watches silently and writes down one thing. Swap back and fix it.
- Arcade's real tools: a teacher-led option. Tilemaps are the big one: a walled maze or a platform level with a scrolling camera is a good next project.
The hard part (on purpose)
Scoping their own game and playtesting early. Ask whether someone can play it yet, before more sprites are drawn.
When students get stuck
- The student is still drawing sprites after 20 minutes. Ask: Can someone play your game yet? Fix: Use simple shapes for now; make the art nice after the game works.
- Nothing happens when sprites touch. Ask: Which kinds are your sprites, and which kinds does each overlap event name? Fix: Make the kinds match the event, as in the Overlaps lesson.
- A hit takes all the lives, or a coin scores again and again. Ask: What happens to the other sprite after the touch? Fix: Destroy it (or move it) inside the overlap event.
- The game never ends. Ask: Which ending did you choose, and where does it happen? Fix: Set life (and lose lives in an overlap), start a countdown, or call game over when the target is reached.
- The student wants to add everything at once. Ask: Which one change would make your game more fun for the player who just tested it? Fix: Add that one, test it, then decide on the next.
Stretch and support
Stretch: Start a second, bigger project with tilemaps: a maze with walls, or a platformer whose camera follows the player across a level wider than the screen.
Support: A working Milestone 1 is a good result. Offer Space dodger (end of Arcade Foundations) or the Power-ups game as a base: change the sprites, the kinds and one rule to make it a new game.
Where it leads
This ends Arcade advanced skills. The Game Maker Guide skillmap (arcade.makecode.com/skillmaps) is the next step for students building their own games. Class ideas: an arcade afternoon where everyone plays everyone's games and leaves one sticky note of praise and one of advice; a short design diary (pitch, what changed after playtesting, what you would add next). Students who want more can explore tilemaps and animation, or move to games in text code later.
What each step is for
- Build your game: Building a game from a plan, in playable milestones, shows whether a student can choose the building blocks a game needs and put them together without step-by-step help.
- Plan a game and choose the building blocks it needs.
- Build a game in playable milestones, testing after each one.
- Improve my game from what I see when someone else plays it.