Drive and stop
Set the speed of each wheel, drive for a time, turn, and stop.
A parade float, a warehouse trolley and a robot lawn mower all start the same way: two wheels, each told how fast to turn, and for how long.
This robot has two wheels, one on each side, each with its own motor. In blocks, robot motor tank sets the speed of the left and right wheel, from −100 (full speed backwards) to 100 (full speed forwards). You find it in Robot.
Every robot program starts with a block that picks the robot: here, an Elecfreaks Cutebot.
- Predict: Read the code and say what it will do before you run anything. A wrong guess is fine: it shows you what to look for.
- Run: Run it and compare the result with your prediction.
- Investigate: Trace how each line of code connects to what you see.
- Modify: Change the code on purpose and check the result.
- Make: Build something new using what you have learned. Expect a few tries; that is normal.
Make your prediction first. Help opens once you've locked it in.
Predict
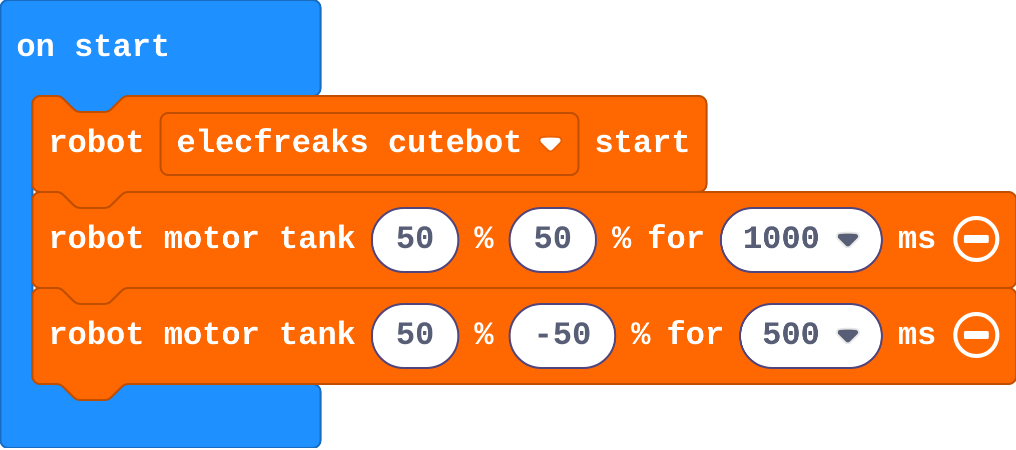
Show as code
robot.elecfreaksCuteBot.start()
robot.motorTank(50, 50, 1000)
robot.motorTank(50, -50, 500)
The for … ms part of a motor block (click its + to show it) is a time: the robot keeps that speed for that long, then the program moves on to the next block. 1000 ms is one second.
Run
Watch the robot in the simulator. If it drives off the edge or into a box, drag it back to the middle and restart the simulator.
Show as code
robot.elecfreaksCuteBot.start()
robot.motorTank(50, 50, 1000)
robot.motorTank(50, -50, 500)
Investigate
This version adds robot motor stop at the end, so the robot stops after its turn.

Show as code
robot.elecfreaksCuteBot.start()
robot.motorTank(50, 50, 1000)
robot.motorTank(50, -50, 500)
robot.motorStop()
Match each pair of wheel speeds with the move it makes. Try any you are unsure of in the simulator.
Ava's program:
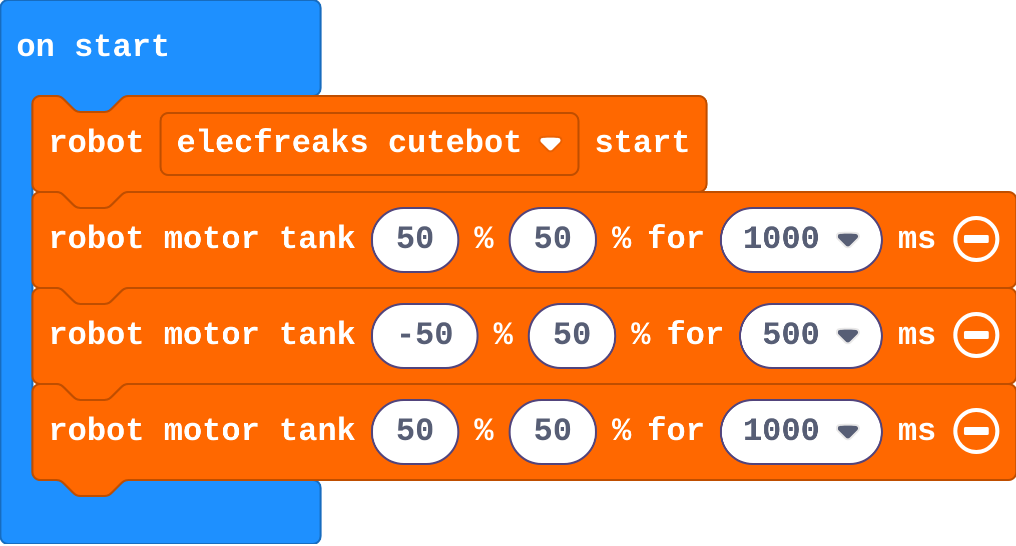
Show as code
robot.elecfreaksCuteBot.start()
robot.motorTank(50, 50, 1000)
robot.motorTank(-50, 50, 500)
robot.motorTank(50, 50, 1000)
Match each pair of wheel speeds with what the robot does.
Modify
After the turn, make the robot drive backwards for one second before it stops.
Need a hint?
Add another robot motor tank before robot motor stop.
Another hint
Make both speeds −50. Click the + on the block to add a time, and set it to 1000 ms.
Add a gentle curve before the stop: left wheel 50, right wheel 20, for 2 seconds. Which way does it curve?
Need a hint?
Add a robot motor tank before robot motor stop.
Another hint
Left 50, right 20, for 2000 ms.
After the turn, drive backwards for 1 second, then stop.
This ticks by itself when your blocks do what is asked.
Before stopping, curve to the right: left 50, right 20, for 2 seconds.
This ticks by itself when your blocks do what is asked.
Make
Make the robot drive a square, like a delivery trolley going round the four sides of a room:
- inside a repeat 4 times: drive forward, then turn
- after the repeat: stop
The turn's time decides the angle. Start with 400 ms and change it until the corners look square.
Need a hint?
repeat is in Loops. Put one drive and one turn inside it, and set it to 4.
Another hint
Drive with 50 50 for 1000 ms; turn with 50 −50. Change the turn's time until each corner looks square. Put robot motor stop after the repeat.
A square: drive and turn, repeated 4 times, then stop.
This ticks by itself when your blocks do what is asked.
On a real robot
The square program runs on a real Cutebot too. Put it on the floor with room to move. Things to notice:
- It will not be a perfect square. One motor is always a little stronger, so the robot drifts. The robot set motor drift block corrects it.
- The turn time changes with the floor and the batteries. Tune it again on the real robot.
- Real robots without wheel sensors cannot measure angles, which is why we turn for a time.
For teachers
Students set each wheel's speed with robot motor tank, drive and turn for a time, and find that a timed move does not stop the motors by itself; they finish by driving a square. About 45 minutes.
Open the teacher guide: answers, solutions, slides and a worksheet.
Students will be able to
- I can set the left and right wheel speeds to drive, turn and curve.
- I can make a move last for a time, and stop the robot at the end.
- I can repeat a drive and a turn to make a shape.
Before class
The robot has two wheels, each with its own motor. robot motor tank sets the left and right speeds from −100 to 100: equal speeds drive straight, opposite speeds spin on the spot, and unequal speeds curve. The optional for … ms box is a time: the robot keeps that speed for that long, then the program moves on. The surprise in this lesson is that a time does not stop the motors: they keep doing what they were last told until another motor block changes them. So every program that should end needs robot motor stop.
Every program starts with a block that picks the robot (Elecfreaks Cutebot here). Schools with another supported robot change only that block. Kitronik MOVE Motor is not yet supported by the robot extension: MOVE Motor classes can use the Kitronik blocks on the real robot (move Forward at speed, spin Left at speed, stop, each with a pause), with the same ideas.
The simulator robot also smooths its speed, so starts and stops are gentle. Turns by time are not exact angles: students tune the turn time until a square looks square, which is what they will do on a real robot too.
Running the lesson
- Predict: most expect it to stop. Ask: which block told it to stop?
- Run: if it disappears off the edge, drag it back and restart the simulator.
- Investigate: let students test the match pairs in the simulator. Ava's robot is the lesson's key idea: a time is not a stop.
- Modify: −50 −50 drives backwards. The curve goes right because the right wheel is slower.
- Make: repeat is in Loops. The turn time for a right angle depends on speed; about 400 ms at 50 is a starting point, then tune.
- Real robot (optional): expect drift. robot set motor drift corrects a robot that pulls to one side.
The hard part (on purpose)
A time on a motor block is not a stop. When the robot keeps spinning, ask what the last block tells the motors.
When students get stuck
- The robot keeps spinning after the program. Ask: What is the last block? Does it stop the motors? Fix: Add robot motor stop at the end.
- The robot does not move at all. Ask: Is the first block robot … start? Are the speeds above 0? Fix: Keep the start block at the top, and use speeds like 50.
- The square's corners are too sharp or too wide. Ask: Which number decides how far it turns? Fix: Change the turn's time, a little at a time.
Stretch and support
Stretch: Drive a triangle (three sides, a bigger turn) and a figure of eight (two curves, one each way).
Support: Give the square's repeat block with one drive inside; students add the turn and the stop.
Where it leads
Next: give each move a name with functions, and build a dance routine. Class ideas: tape a square on the floor and see whose real robot finishes closest to its start.
What each step is for
- Investigate: A motor keeps doing what it was last told. A time on a motor block only says when to move on to the next block, so a robot needs a stop.
- Modify: Changing the two speeds changes the move; the time changes how far it goes.
- Set the left and right wheel speeds to drive, turn and curve.
- Make a move last for a time, and stop the robot at the end.
- Repeat a drive and a turn to make a shape.