Send data to the computer
A micro:bit sends each sensor reading down the USB cable as a line of text, such as light:128. The computer turns the stream of lines into a graph.
Weather stations, heart-rate monitors and the sensors in a science lab all do the same simple thing: send a reading, wait, send the next. A computer collects the readings and draws the graph.
In micro:bit Foundations, everything you made stayed on the micro:bit. Now it talks to the computer it is plugged into. A cable that sends text one line at a time is called serial.
- Predict: Read the code and say what it will do before you run anything. A wrong guess is fine: it shows you what to look for.
- Run: Run it and compare the result with your prediction.
- Investigate: Trace how each line of code connects to what you see.
- Modify: Change the code on purpose and check the result.
- Make: Build something new using what you have learned. Expect a few tries; that is normal.
Make your prediction first. Help opens once you've locked it in.
Predict
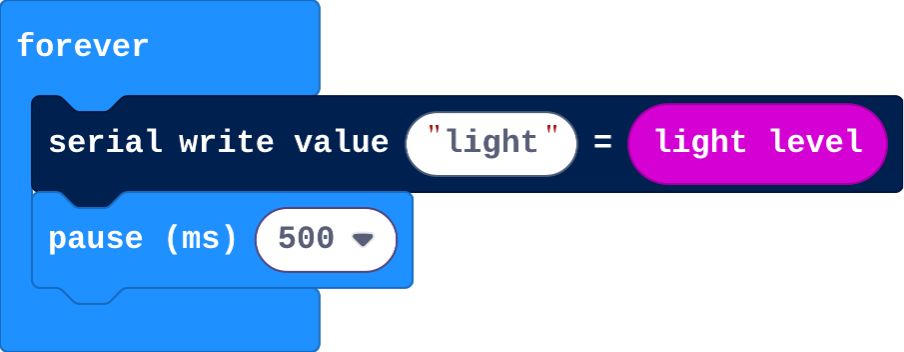
Show as code
basic.forever(function () {
    serial.writeValue("light", input.lightLevel())
    basic.pause(500)
})
Run
Run it in the simulator. Under the micro:bit, click Show data (it appears once a program sends values) to see the readings as numbers and as a graph. Drag the simulator's light level up and down.
Show as code
basic.forever(function () {
    serial.writeValue("light", input.lightLevel())
    basic.pause(500)
})
On a real micro:bit
Click Download in the editor and copy the program to your micro:bit. Leave it plugged in, then click Connect a micro:bit below and choose it. Cover the micro:bit with your hand, then shine a torch on it.
Download the program to a micro:bit, connect it, and collect at least 10 light readings.
Use the board. This ticks when you get there.
Investigate
Show as code
basic.forever(function () {
    serial.writeValue("light", input.lightLevel())
    basic.pause(500)
})
Ben's program:
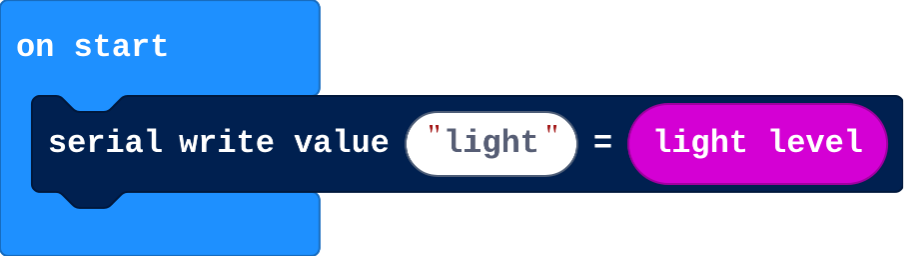
Show as code
serial.writeValue("light", input.lightLevel())
Modify
Send the temperature too, with its own name. In Show data (or on the board), each name gets its own line.
Need a hint?
Add a second serial write value inside forever, named temperature, with temperature (°C) from Input.
Make it send ten readings a second.
Need a hint?
Change the pause so it sends ten readings a second.
Send the temperature as well as the light level, each with its own name.
This ticks by itself when your blocks do what is asked.
Send ten light readings a second.
This ticks by itself when your blocks do what is asked.
Make
Make a tilt logger: send the micro:bit's x and y acceleration five times a second, and send the line mark when A is pressed, so you can mark a moment on the record. Tilt it in the simulator and watch Show data.
Need a hint?
Acceleration (mg) is in Input; choose x, then y.
Another hint
Two serial write value blocks in forever: x and y. On button A pressed: serial write line mark.
A tilt logger: send x and y acceleration five times a second, and send the line mark when A is pressed.
This ticks by itself when your blocks do what is asked.
For teachers
Students make a micro:bit send sensor readings to the computer over USB as named lines of text, and watch them graphed. About 45 minutes.
Open the teacher guide: answers, solutions, slides and a worksheet.
Students will be able to
- I can send a sensor reading to the computer again and again.
- I can explain what travels down the cable (a named line of text).
- I can send two values and choose how often they are sent.
Before class
The idea: a micro:bit plugged into a computer can send text down the USB cable, one line at a time (this is called serial). serial write value sends a line such as light:128: a name, a colon and a number. Whatever is on the other end (MakeCode's Show data, the board in this lesson, a spreadsheet) turns those lines into a table or a graph.
Without micro:bits: the MakeCode simulator shows the values under Show data, so every required step works in the browser. The board step ("On a real micro:bit") is optional and needs a micro:bit, a data USB cable and Chrome or Edge.
With micro:bits: students download the program, leave the micro:bit plugged in, and click Connect a micro:bit on the board. Only one page can use the cable at a time, so if MakeCode is connected to the micro:bit, disconnect it there first.
Running the lesson
- Predict: most say a graph. Ask: who draws the graph, the micro:bit or the computer?
- Run: Show data appears under the simulator once values arrive.
- On a real micro:bit: covering it and shining a torch makes a clear graph.
- Investigate: Ben's logger is the on start versus forever slip from Foundations.
The hard part (on purpose)
The text format links the micro:bit and the board. When nothing shows, ask whether the program is running and the write block is inside forever.
When students get stuck
- Show data never appears. Ask: Is the program running? Is serial write value inside forever? Fix: Restart the simulator; put the send inside forever.
- Connect a micro:bit lists nothing. Ask: Are you in Chrome or Edge, with a data cable? Fix: Use Chrome or Edge; try another cable (some only charge).
- Only one reading arrives. Ask: Which block is the send in? Fix: Move it into forever with a pause.
Stretch and support
Stretch: Send the sound level too, and find out which is noisier: the classroom or the corridor.
Support: Give the Make program with x done; students add y and the button.
Where it leads
Next: the computer sends commands to the micro:bit. Real world: data loggers in science labs, weather stations and fitness trackers.
What each step is for
- On a real micro:bit: The same lines arrive from a real micro:bit, and a different program (this board) can graph them: the text format is what connects the two.
- Investigate: Each reading is a named line of text sent again and again; the name tells values apart and the pause sets how often a reading is sent.
- Modify: A second named value appears as its own line on the graph; changing the pause changes how often readings arrive.
- Send a sensor reading to the computer again and again.
- Explain what travels down the cable (a named line of text).
- Send two values and choose how often they are sent.