A model drives a micro:bit
The board sends your model's label down the USB cable as a line of text. The micro:bit's program decides what each label does, and must also handle labels it doesn't expect.
A sorting machine's camera and its motors are separate parts. The camera's model only says 'Plastic'; a small controller decides which flap to move. The two have to agree on every word.
Last lesson you trained a model that labels photos. Now its labels drive a micro:bit, the same way the board's buttons did in Commands from the computer: the board sends the label as a line of text over the USB cable, and the micro:bit's program decides what to do.
You need: a micro:bit, a USB cable, and Chrome or Edge on a laptop or Chromebook (other browsers can't talk to a micro:bit). The MakeCode simulator can't receive these messages, so the board steps run on a real micro:bit.
- Predict: Read the code and say what it will do before you run anything. A wrong guess is fine: it shows you what to look for.
- Run: Run it and compare the result with your prediction.
- Investigate: Trace how each line of code connects to what you see.
- Modify: Change the code on purpose and check the result.
- Make: Build something new using what you have learned. Expect a few tries; that is normal.
Make your prediction first. Help opens once you've locked it in.
Predict
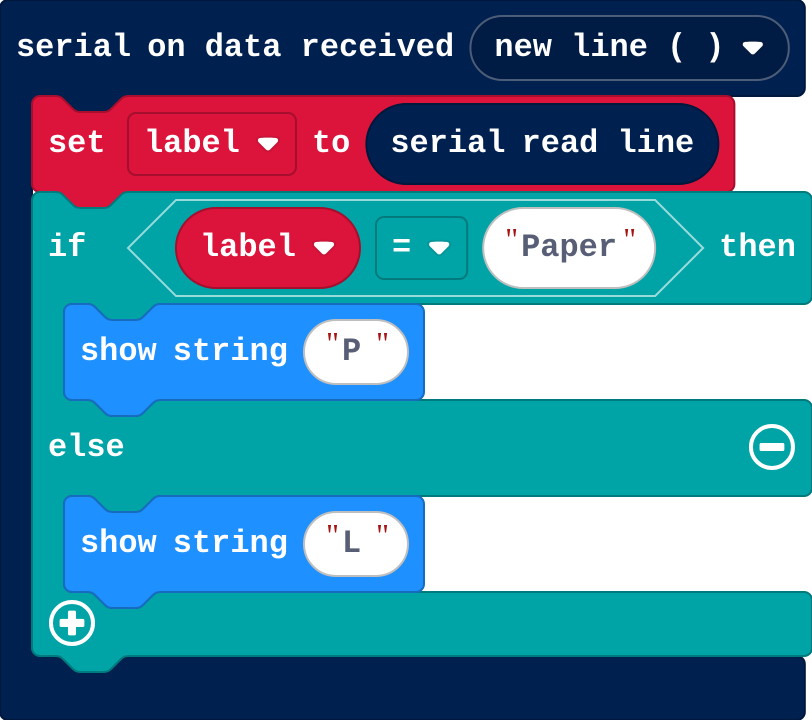
Show as code
serial.onDataReceived(serial.delimiters(Delimiters.NewLine), function () {
    label = serial.readLine()
    if (label == "Paper") {
        basic.showString("P")
    } else {
        basic.showString("L")
    }
})
let label = ""
Run it on a micro:bit
Click Download in the editor and copy the program to your micro:bit. Leave it plugged in. If the editor is connected to the micro:bit, disconnect it (or close that tab): only one page can use the cable at a time.
Show as code
serial.onDataReceived(serial.delimiters(Delimiters.NewLine), function () {
    label = serial.readLine()
    if (label == "Paper") {
        basic.showString("P")
    } else {
        basic.showString("L")
    }
})
let label = ""
Send labels
Paste your model's link and click Load, then Connect a micro:bit and choose it in the list. Click a test photo to send its label, or use the webcam: it sends a label once the same label has held above 80% confidence for a moment. Watch the micro:bit.
Connect your micro:bit and send at least three labels.
Use the board. This ticks when you get there.
Investigate
Show as code
serial.onDataReceived(serial.delimiters(Delimiters.NewLine), function () {
    label = serial.readLine()
    if (label == "Paper") {
        basic.showString("P")
    } else {
        basic.showString("L")
    }
})
let label = ""

Show as code
serial.onDataReceived(serial.delimiters(Delimiters.NewLine), function () {
    label = serial.readLine()
    if (label == "paper") {
        basic.showString("P")
    } else if (label == "plastic") {
        basic.showString("L")
    }
})
let label = ""
Modify
Give Neither its own branch that shows a cross, and make Plastic a branch of its own too.
Need a hint?
Change else to else if, and add a third branch: label = "Neither".
A sorter should say what it did. Make the micro:bit reply with serial write value: bin 1 for Paper, 2 for Plastic, 0 for anything else. On the board, the replies appear under the buttons.
Need a hint?
serial write value is in Serial. Give it a name such as bin and a number.
Another hint
Paper sends bin 1, Plastic bin 2, anything else bin 0.
Plastic shows L, and Neither shows a cross (show icon).
This ticks by itself when your blocks do what is asked.
The micro:bit replies with which bin it chose (bin 1, 2 or 0).
This ticks by itself when your blocks do what is asked.
Over radio
A sorter on a conveyor belt is not plugged into a laptop. This is the bridge from A radio bridge: the micro:bit on the cable passes each line on by radio, and passes radio values back to the board. Add on radio received string so a second micro:bit shows the first letter of each label and replies got 1. Download the same program to both micro:bits; plug one into the computer.
On radio received string, show the first letter and send the value got 1 back.
This ticks by itself when your blocks do what is asked.
Make a sorting flap
Build a sorting flap: a servo on P0 on the second micro:bit tips left for Paper, right for Plastic, and stays in the middle for anything else, then replies with the bin. Try it with your model and real items.
Need a hint?
A servo on pin P0: servo write pin P0 to 30 for Paper, 150 for Plastic and 90 (the middle) for anything else.
Another hint
After each move, send the bin back by radio: radio send value bin 1, 2 or 0.
A sorting flap: the radio label sets a servo on P0 to one angle per label, the middle for anything else, and replies with the bin.
This ticks by itself when your blocks do what is asked.
On a real micro:bit
- Chrome or Edge only. Safari, Firefox and iPads can't connect.
- "The micro:bit is busy": another tab (often MakeCode) is using the cable. Disconnect it there or close that tab.
- Same radio group on both micro:bits, and a different group for every pair in the room.
- A servo needs more power than USB sometimes gives: if it twitches or the micro:bit resets, use a battery pack or a servo board.
For teachers
Students send their model's labels from the board to a micro:bit over USB, program the micro:bit to act on each label and reply, then pass labels on by radio to a sorting flap. About 50 minutes.
Open the teacher guide: answers, solutions, slides and a worksheet.
Students will be able to
- I can program a micro:bit to act on lines of text it receives over USB.
- I can explain why the sender and receiver must agree on every word.
- I can handle a label my program doesn't expect.
Before class
The idea: the model sends only a word. The receiving program gives it meaning, so both sides must agree on the exact words (capital letters included), and the program needs a sensible action for anything else.
How it works: the board (in Chrome or Edge) connects to the micro:bit with Web Serial at 115200 baud, MakeCode's default. When students click a test photo, the board sends its predicted label as a line of text; with the webcam, it sends a label once it has held above 80% confidence for a moment and differs from the last one sent. Lines the micro:bit sends back (serial write value gives bin:1) appear on the board.
Hardware: a micro:bit and USB cable per pair; for Make, a second micro:bit and a small servo on P0. The MakeCode simulator cannot receive serial, so the board steps need real micro:bits. The hardware steps are marked typical, so students without hardware can still complete the lesson.
Before class: check that Chrome or Edge on student devices lists the micro:bit after Connect a micro:bit. Assign each pair a radio group.
Running the lesson
- Predict: many say Nothing. Ask: which lines reach else?
- Send labels: students click photos first (reliable), then try the webcam.
- Investigate: Ben's sorter is the exact-text bug. Ask students to read both sides aloud.
- Modify: the reply is how a real sorter reports what it did.
- Make: test the flap angles without the model first by sending from the board's photos.
The hard part (on purpose)
Seeing that the model sends only a word. When the micro:bit does nothing, ask whether the board shows the label leaving and the word matches exactly.
When students get stuck
- Connect a micro:bit lists nothing. Ask: Is the micro:bit plugged in with a data cable, and are you in Chrome or Edge? Fix: Try another cable (some only charge) and use Chrome or Edge.
- The board says the micro:bit is busy. Ask: Is MakeCode connected to it in another tab? Fix: Disconnect it in MakeCode or close that tab, then connect again.
- Labels are sent but nothing happens. Ask: Does your program check for exactly the words your model sends? Fix: Match the class names exactly, capital letters included.
Stretch and support
Stretch: Count how many items go in each bin and show the totals when button A is pressed.
Support: Give the reply branch complete; students add the Neither branch only.
Where it leads
Next: AI on the micro:bit, a model trained on movements that runs on the micro:bit itself. Later, AI robots: a robot driven by a model, where a wrong or unsure label becomes a wrong move.
What each step is for
- Send labels: Watching each label leave the board and the micro:bit's display change makes the message concrete: a word, nothing more.
- Investigate: The model sends only a word; the receiving program gives it meaning, so both sides must agree on the exact words, and the program must handle words it doesn't expect.
- Modify: Giving every label its own branch, and replying, makes the two sides agree.
- Over radio: A micro:bit on the cable can pass each label on by radio, so the build that acts on it can be anywhere in the room.
- Program a micro:bit to act on lines of text it receives over USB.
- Explain why the sender and receiver must agree on every word.
- Handle a label my program doesn't expect.